Thread: Harrison Mill Conversion
-
08-09-2008 #1
Finally got some photos of the machine that's being converted


No work has been done to the actual machine yet, as I need to keep it as usable as possible, so things will be getting done in stages.
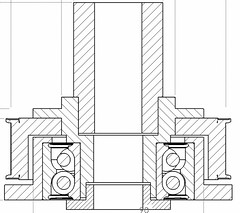
So far I've got the design for the Z-axis ball screw conversion done, which has taken a couple years so far due to other things getting in the way, and me getting frustrated at trying to come up with a workable solution to fit in the available space.
I finally came up with this solution last month -
 .
.
I've so far got the bearing housing machined (still needs the bolt mounting holes drilled/countersunk), and am currently waiting for the ballscrew and nut to arrive, so I can get the big chunk of bar in the lathe and machine it in one go.
Progress so far -

The mill doesn't have a Quill, so I'm having to CNC the knee.
Going by my motor power/ballscrew spreadsheet, the stepper alone should be able to move the knee, but it won't leave much power for milling, so I'm going to counterbalance the knee using an air cylinder on each side of the knee. My rough guestimate so far is that two 40mm air cylinders should be adequate, but I'll weigh the table/knee when I get them dismantled for a more accurate weight figure, and then decide on cylinder diameter.
I've also got a collection of bits for the control/drive.
So far I have a 6.5Nm stepper from ArcEuroTrade, a 625VA 55V toroidal, big capacitor, bridge rectifier, a SmoothStepper coupled to a CNC4PC C23 BOB,and as of today a Gecko 203V (and a couple G251 for future use).
Ultimately I'd like to use the planned Gecko Stepper PID (planned for later this year, but more likely sometime next year), hence why I've only bought one G203V. If the PID drives aren't ready in time for when I get round to the x and y, then I'll just buy another couple G203vs.
My aim is to get the Z-axis CNC'd first (it'll at least save me having to crank the knee up/down!), then think about how the other two axis are going to be converted.
At the moment, I've been working on the control box design.
I've so far got a rough layout drawn, and know what heatsinks I'm going to be using, but I still need to get the wiring and smaller components sorted out. At the moment, I've got a few sketches and ideas of possible solutions, but I just need to decide what exactly I'm going to use, and how to fit them together.
-
10-09-2008 #2
Ball screw finally got delivered today, so I can now get on with machining the next couple of parts :)
Last edited by m_c; 15-09-2008 at 10:19 PM. Reason: slight typo
-
15-09-2008 #3
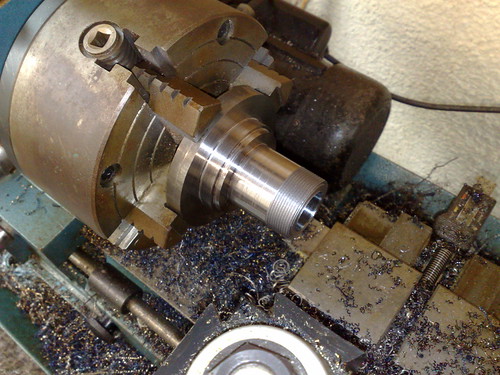
Got some time tonight to get started on the z-axis ball nut carrier. Got it drilled/bored out to allow the ball screw to pass through, and bored/turned the internal thread for mounting the ball nut.
Was a bit nerve racking having to unscrew the ball nut of the screw, and nearly let the balls drop out at one point, but thankfully they were well greased which kept them in place til I got the mandrel back in!
The rest of the machining on the ball nut carrier should now hopefully be pretty striaight forward, so I should hopefully gett it finished this week.

-
The Following User Says Thank You to m_c For This Useful Post:
-
15-09-2008 #4
MC,
Careful with that power supply, 55 volts AC when rectified and smoothed will be 77 volts, very close to the 80 volt limit of the Gecko's and not a lot to play with when the stepper is winding down.
I made the mistake of ordering a 55v one from RS and saw 82 to 85 volts at times. Swapped it out for a 50 volt one and had no problems. The 55 volt one is still in a drawer and I may use this on one of my personal machines with one of Arc's large drivers that can handle 90 volts.
John S.
-
16-09-2008 #5
I knew the 55V would be getting close to the limit, but I'm hoping it would come in under the 80v. I'm planning on putting in reverse energy dumps to prevent voltage rise issues from the stepper motors slowing, but I guess I'd better get the power supply bits bodged together to see exactly what voltage it's going to put out.
-
18-09-2008 #6
Just a quick update.
Have mostly finished the lathe work on the ballnut carrier, just needs to spun in the chuck, and the top flange machined down to size, and some bolt holes drilled.
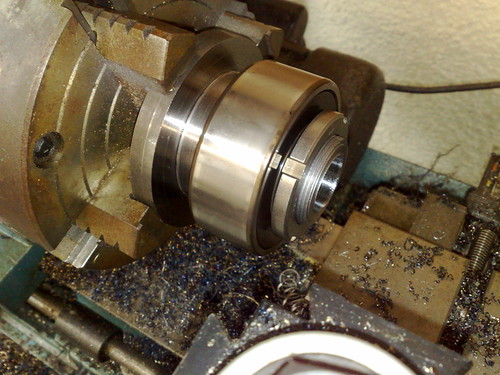
I decided to go for a SKF nut for securing the bearing in the end.
For £7, it saves me a lot of time/effort making my own.
Next part of the puzzle is finding a suitable pulley to machine, and making up a base plate to mount everything onto the mill.


-
18-09-2008 #7
Looking good M_C this should be a good log to keep an eye on, cant wait to get my lathe !
.Me
-
22-09-2008 #8
Not much been happening lately. Ballnut carrier now has all the lathe work finished on it, and is now just needing the holes drilled in it for mounting the pulley, along with a slot for the locking tab washer for the securing nut.
I'm holding of setting up the rotary table just now, as I'd like to drill/thread/counterbore/sink all the required holes at the same time to make sure everything is going to line up.
I've just ordered the required 72t pulley from HPC, but they're not showing as having any in stock, so this project may be on hold for a short period until that appears.
However that does mean I can turn my attention back to the controller...
-
25-09-2008 #9
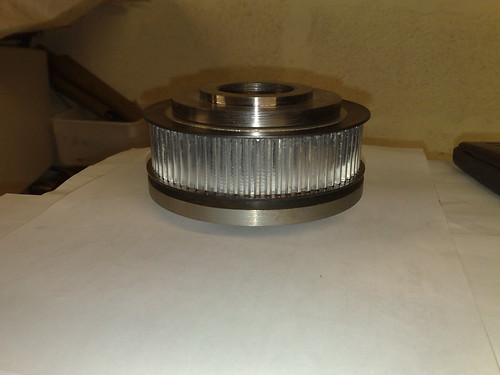
Turns out HPC did have the gears in stock and they turned up yesterday, so knocked one of the flanges of, and got it mounted in the lathe

Finished boring it out tonight, and the trial fit is good.

I now need to source the required bolts and countersink to get everything bolted together, then I can concentrate on the electronics to get movement before it gets put onto the mill.
-
24-11-2008 #10
Looks like Mr S. was right.
Hooked the basic PSU bits up on the bench yesterday, to find a nice stable 82.7V across the cap :(
Now got a 0-50V toroid on order.
Not had much time to do much with the CNC bits, as I've had a few repairs to do, but should get some time over the next few weeks to make some more progress.
Have got the case for the control cabinet. It's a steel case from RS. so now I just need to source all the other bits for inside it.
Thread Information
Users Browsing this Thread
There are currently 1 users browsing this thread. (0 members and 1 guests)
Similar Threads
-
CONVERSION: Sx3 mill conversion
By dazza in forum Conversion Build LogsReplies: 1Last Post: 29-04-2014, 10:23 AM -
NEW MEMBER: Saying hello, about to start a mill conversion.
By irgonomics in forum New Member IntroductionsReplies: 4Last Post: 28-04-2013, 03:35 PM -
CONVERSION: My Sherline Mill Conversion videos
By panofish in forum Conversion Build LogsReplies: 2Last Post: 06-05-2012, 07:13 AM -
Mill conversion to cnc
By wolsey in forum General DiscussionReplies: 1Last Post: 15-08-2011, 11:07 PM -
Help with drill-Mill conversion
By Ross77 in forum Milling Machines, Builds & ConversionsReplies: 134Last Post: 02-04-2010, 10:25 AM


 Reply With Quote


Bookmarks