
Threaded View


-
26-11-2016 #9

 Current Activity: Viewing


Wiring. Lots and lots of wiring.
And how do you wire a retrofit?
.
Thankfully, Denford are quite happy to make available what wiring diagrams they have for older machines. Their forum (www.denfordata.com) contains lots of information, and also a few different sets of wiring diagrams for Triac's, and having already retrofitted a Cyclone lathe, I've learnt a good bit about how they do things.
.
The first problem I knew I had to deal with was the homing sensors. Denford use NAMUR output sensors, which are a two wire sensor aimed at explosion risk applications. It has been asked on the Denford forum why they were chosen, but none of the current employees know.
They could be made to work, either through some expensive NAMUR barrier interfaces, cutting the old control board up to get the required circuit, or playing around with opamps, resistors and transistors, but swapping them out for new 3 wire sensors makes far more sense.
.
Until you realise where the wiring runs for the X-axis sensor and limit switches, and the existing 4 core cable needs an extra core. All the X-axis switches sit at the front of the table underneath the front bellows, and upon initial inspection, I thought the wiring passed down through the front of table, and I was looking at a major strip down job to run new wiring.
After a bit studying of parts diagrams, a good bit umming and arring, a start was made, with me expecting to need to remove the complete Y assembly from the mill, and possibly even the mill from the enclosure. However, after reaching this point-
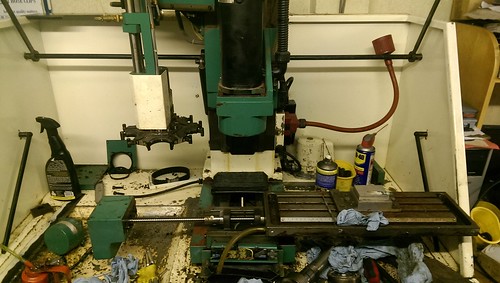
A deep breath of relief was had, upon realising the wire simply passed over the top of the assembly, before going down through a hole and being cable tied to the autolube pipes underneath the base-
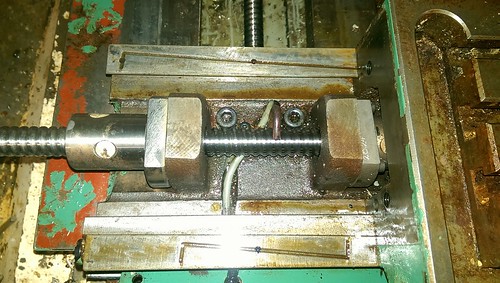
With some use of various pliers, side cutters, and skin removal, I managed to get the old cable removed, and a new cable fed in. For the new cable, I opted for some high oil resistance chainflex cable from Igus (CF9.02.06 to be precise), which is a similar diameter to the old cable, but with 6 cores.
Something to consider when carrying out a retrofit, is the condition of the original wiring. Although this cable was still functional, underneath the table, the wire had gone brittle, so it would of likely failed at some point fairly soon. Spending a bit extra time during the retrofit to check things can save you lots of unplanned grief later.
.
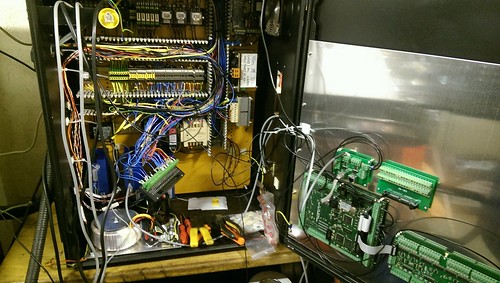
Now the biggest wiring headache on the machine has been dealt with, and the main new bits are mounted in the cabinet, it 'just' leaves this to sort out-
 Avoiding the rubbish customer service from AluminiumWarehouse since July '13.
-
The Following User Says Thank You to m_c For This Useful Post:

 Reply With Quote
Thread Information
Users Browsing this Thread
There are currently 1 users browsing this thread. (0 members and 1 guests)
Similar Threads
-
Denford Triac - Help
By mikeadams1985 in forum Denford MillsReplies: 1Last Post: 12-01-2017, 10:06 AM -
FOR SALE: Denford Triac CNC PC
By ricey3 in forum Items For SaleReplies: 6Last Post: 10-01-2017, 01:39 PM -
Denford Triac VMC
By fidia in forum Milling Machines, Builds & ConversionsReplies: 6Last Post: 19-08-2016, 08:18 AM -
Help Denford triac p.c.
By mikeulike in forum Denford MillsReplies: 3Last Post: 02-06-2015, 03:59 PM -
WANTED: Denford Triac
By edwardsjc in forum Items WantedReplies: 13Last Post: 20-08-2012, 08:17 AM

Bookmarks