
Hybrid View


-
25-12-2016 #1

 Last Activity: 2 Days Ago


Ignoring the soft limit debate for now, which I will revisit when I get onto configuring the KFlop, I'll do a little bit more on wiring.
Now that the new home switches are installed, I had to wire them into the controller.
The original wiring for the 2 wire home switches, had two of the sensors common wires doubled up, and everything else on separate pins in the main machine connector, so the original sensors used a total of 5 pins.
For the new 3 wire sensors, I needed 2 power wires, and 3 signal wires, so the same number of wires were needed.
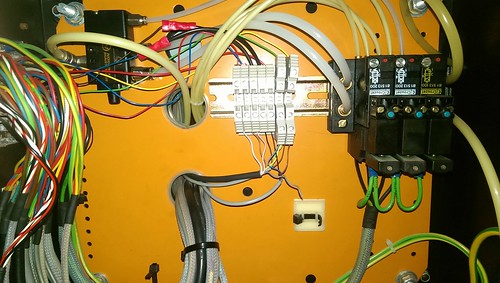
One thing I hate is connecting multiple wires into single terminals. Although it will work, it makes future replacement and testing harder. Luckily the Triac has an extra enclosure on the rear of the machine for the pneumatics, which originally looked like this -
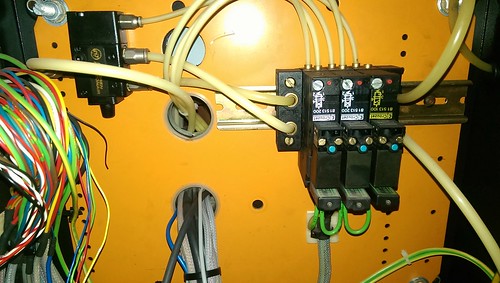
After sliding the solenoid block along, and extending some of the tubing, we end up with plenty room for some terminal blocks-
The two double height blocks provide a GND and 24V supply for on the machine, which the new home switches use. It also gives a convenient connection point for future additions that need 24V.
The extra two blocks are for the X-axis limit switch connections, so all the X-axis cable connections are in the same place.
And now I've found a picture, here's the original X-axis switch setup-
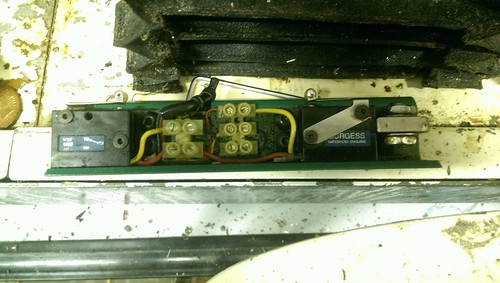
Unfortunately I never took a picture of the new setup, but the only difference is a new proximity sensor, and the two way terminal block swapped to a three way. I could of used the existing setup just by soldering the limit switch common wires together, but why do that when you can make life even more awkward and fiddly for yourself?
Which while I'm on wiring, brings me to bootlace ferrules.
One thing that often results in untidy wiring, are stray wire strands at connectors. Especially once a wire has been removed and put back in a couple times, the problem usually gets worse.
A bootlace ferrule, not only keeps things tidier, it also provides support for the wire, and makes inserting wiring into terminals easier.
On thin wiring, such as is normally found on sensors, this makes a big difference, as you'll often find once a thin wire has been removed and reinserted a couple times, several of the strands will get broken, so you have to cut back the wire. Using a ferrule pretty much eliminates that problem.Avoiding the rubbish customer service from AluminiumWarehouse since July '13.
-
The Following User Says Thank You to m_c For This Useful Post:

 Reply With Quote
Thread Information
Users Browsing this Thread
There are currently 1 users browsing this thread. (0 members and 1 guests)
Similar Threads
-
Denford Triac - Help
By mikeadams1985 in forum Denford MillsReplies: 1Last Post: 12-01-2017, 10:06 AM -
FOR SALE: Denford Triac CNC PC
By ricey3 in forum Items For SaleReplies: 6Last Post: 10-01-2017, 01:39 PM -
Denford Triac VMC
By fidia in forum Milling Machines, Builds & ConversionsReplies: 6Last Post: 19-08-2016, 08:18 AM -
Help Denford triac p.c.
By mikeulike in forum Denford MillsReplies: 3Last Post: 02-06-2015, 03:59 PM -
WANTED: Denford Triac
By edwardsjc in forum Items WantedReplies: 13Last Post: 20-08-2012, 08:17 AM

Bookmarks