
Thread: Scrap Heap Challenge
-
09-09-2012 #1

 TrickyCNC
Last Activity:
TrickyCNC
Last Activity:


ok, so it's already built, and I use it every day in my workshop, but I thought at least put a few pics....
Last edited by TrickyCNC; 09-09-2012 at 06:15 PM.
-
09-09-2012 #2

 Last Activity: 17-03-2017


working ok for me... are the pics on your pc or online? and have you got java enabled.... (if you recently installed a Java update you might need a reboot)
At the risk of teaching grandmothers etc....
Click insert image button
chose the image location on your PC, or select a URL, click upload...
-
09-09-2012 #3
TrickyCNC
Last Activity:
ooh ... it seems I can paste a bit in the reply :)
Basicaly, about a year ago I started learning how to make a CNC machine.One day I went to visit my dad, and asked him if he had any pipe I could use for the rails. (he had a metal fab business ). "Come and have a look see - " he said, and started rummaging through a pile of junk ...
I thought for free, I'd take them !
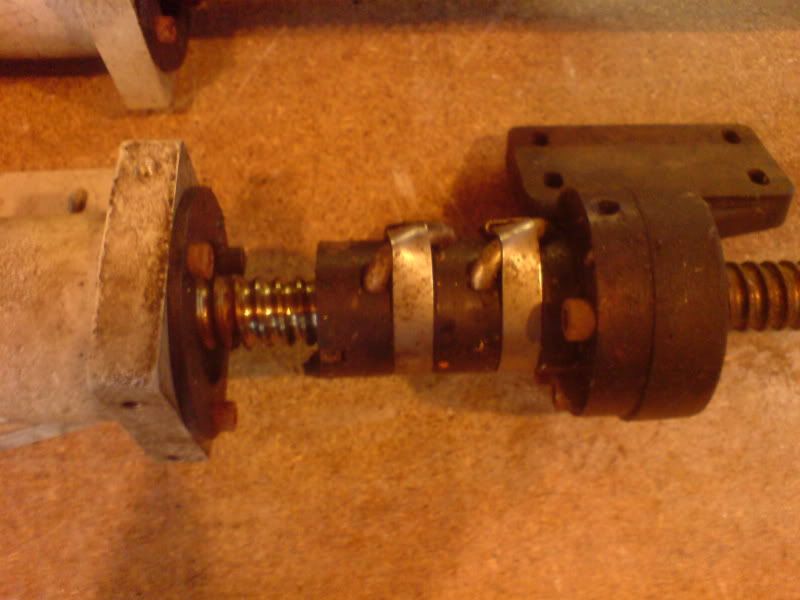
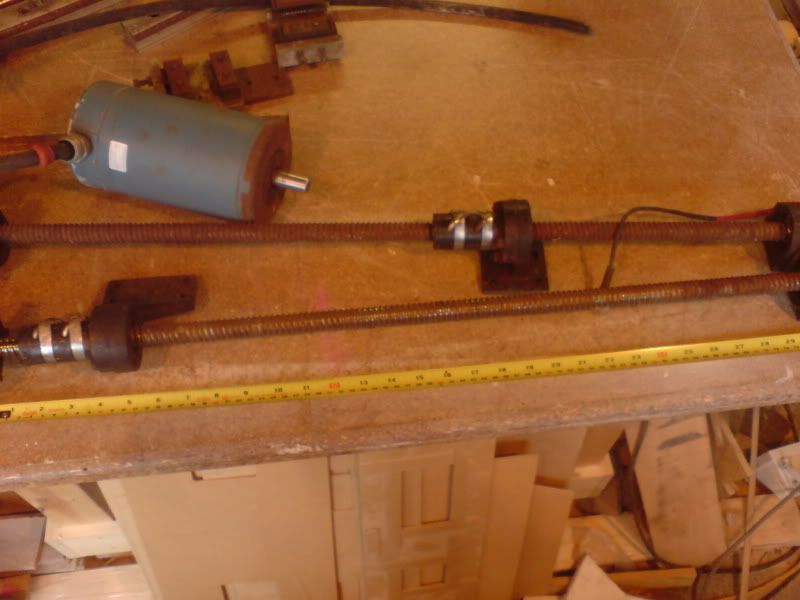
VERY rusty, bearing balls missing ...Screw threads corroded etc etc... but at least I could start 'learning' how it all goes to gether.
Anyway... long story short (for now)
this is how it looks since it started working for me early this year.
It was only rigged up to test it, but it worked so well, it's been like this ever since. Cutting at least 2 or 3 hours every day !
\/ \/ \/ CLICK ON IMAGE BELOW, TO PLAY VID \/ \/ \/
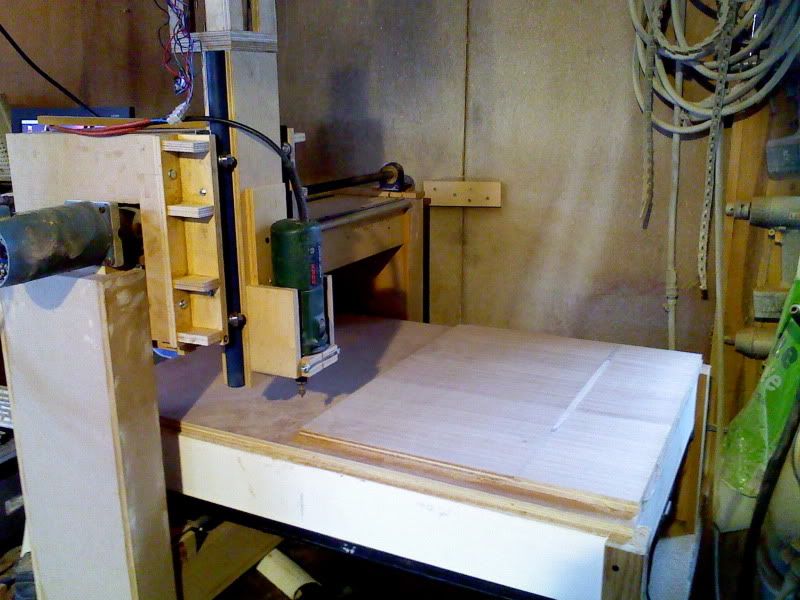
It's still not finished. I plan to add a 4th axis over the end for a lathe attachment.
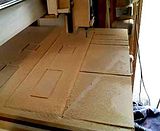
Cutting area is 25.5" x 24.5". I can get a 2x4 1/4 sheet on the bed with room to spare.
Construction is torsion box 12mm MDF
The most 'slop' in the build, is from those worn out hiwin type bearings on the X :(
But is works perfectly for what it was designed to do. I
t cuts at approx 150IPM at 1/8" passes. cant go faster at the mo, as my old router bearings are on the way out and squeel a bit !
But it's plenty fast enough for now.
I'll add some more details over time, and feel free to ask any questions.
RichLast edited by TrickyCNC; 09-09-2012 at 11:08 AM. Reason: Video fix
-
09-09-2012 #4
TrickyCNC
Last Activity:
video didn't work ?can
we embed video on here ?
-
09-09-2012 #5
TrickyCNC
Last Activity:
LOL ! yes, sucking eggs :)
Thanks Irving, but my cursor dissapeared in the text box. It's happened before on this forum, which is why I never got to post my build here.
Seems ok in the reply box though :)
-
09-09-2012 #6
Last Activity: 05-04-2020
I've done it for you. Just went to the video on photobucket and copied the link called IMG code. This forum does not have HTML enabled, presumably to help avoid spam, so the html link you used wouldn't work.
 Originally Posted by TrickyCNC

Can't say I'm not surprised it works smoothly with that amount of rust. Have you measured how much backlash you're getting and how much play there is in the X-axis bearings?
-
09-09-2012 #7
TrickyCNC
Last Activity:
luckily no backlash, but it's a struggle to preload the play out of the bearings.
I later told my dad about them, and he said " Oh yeah ... I remember now, that's why they were in the skip ! " LOL
Anyway, all my parts come out the correct size, and no issues cutting profiles or V carving. the play translates to 'nodding' of the Z when cutting 3D stuff though, with the short stop/start accel's. I plan to add some angle and skate bearings to the outer edges to stop this. sort of additional X rails
Like I said, I built this just to test theory and see how things work. but it worked too well to start again, so I just used it as is.
I'm more than happy with the MDF bed , Z, and gantry. No movement / flex / twist at all . which was what I wanted to test.
-
09-09-2012 #8
 Last Activity: 24-03-2022
holy sh*te!!
thats a winner !
you have definately got some skill getting that lot to earn its keep :)
great stuff
-
09-09-2012 #9
 Last Activity: 23-09-2017
Presumably you never used any of the spreadsheets for working out torsional stiffness and power of stepper motors required ?


Well done that man, practice prevails over theory.John S -
-
09-09-2012 #10
TrickyCNC
Last Activity:
Ha Ha !
Thanks Both
I read and read, then over sized all the MDF sections, and all was good.
Yes, build it - try it , saves much time over spread sheets and theory :)
I did spend a few weeks of nights acid cleaning the rust, and ordered some 3mm ball bearings for the bearing bodies.
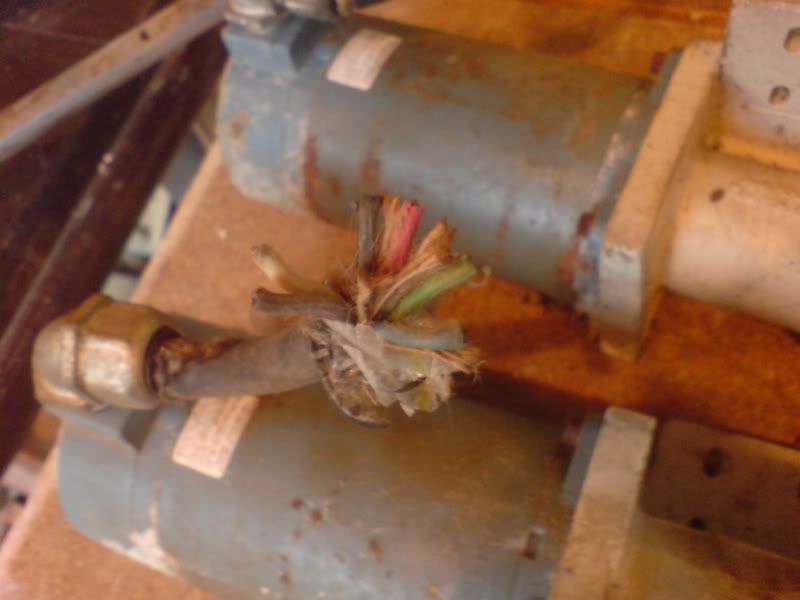
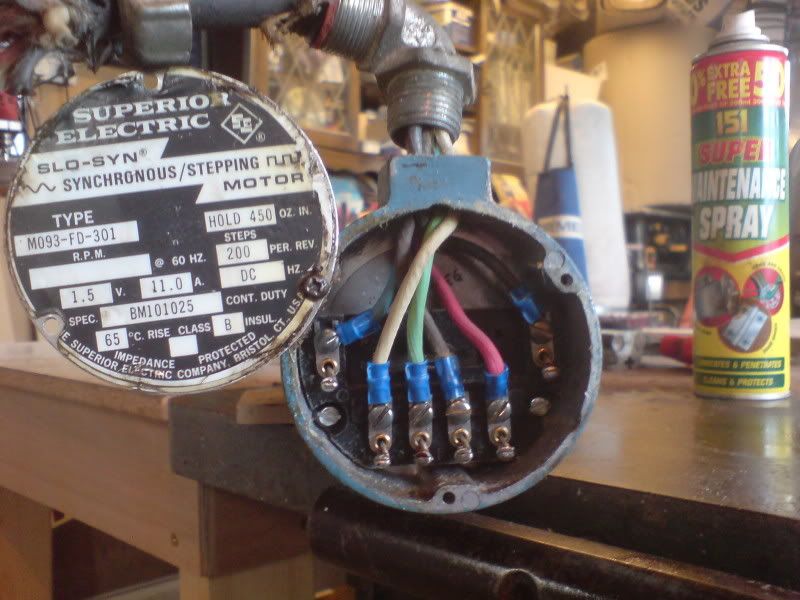
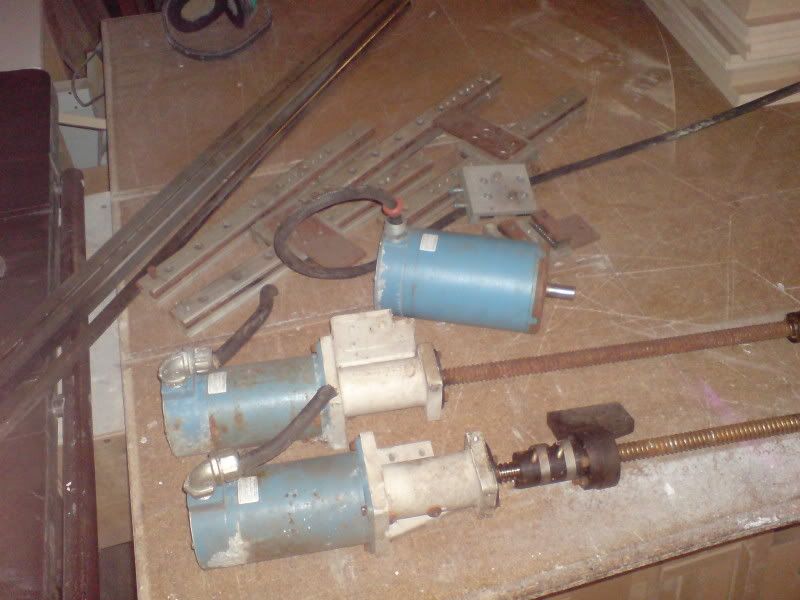
The motors are actually vastly over the top. I am probably driving them at about 20% of their potential. But they were free, and with a multi meter across the windings , I figured out how to wire them up to my 542's, and all is good there too.
I am thinking of re-using them to make an Aly mill after I build my bigger MDF machine.
I bought the 542 drivers as a 3 axis kit from Zap, and have been very pleased with them. I've had it up to 500IMP rapids with 180IPM cuts :) but keep it at 180IPM Rap and 150IPM cuts for trouble free day to day cutting.
Rich

 Reply With Quote
Thread Information
Users Browsing this Thread
There are currently 1 users browsing this thread. (0 members and 1 guests)
Similar Threads
-
Recycle electronics or scrap?
By gavztheouch in forum General ElectronicsReplies: 2Last Post: 05-02-2014, 04:16 PM -
BUILD LOG: Definately a scrapyard challenge
By motoxy in forum DIY Router Build LogsReplies: 158Last Post: 29-10-2012, 10:12 PM -
NEW MEMBER: Up for a challenge......
By swatt in forum New Member IntroductionsReplies: 1Last Post: 03-10-2010, 10:57 PM -
Fancy a challenge?
By cassius in forum Machine DiscussionReplies: 5Last Post: 03-09-2010, 02:44 PM -
BUILD LOG: Work scrap bin router build
By Vic66 in forum DIY Router Build LogsReplies: 32Last Post: 17-01-2010, 08:51 PM

Bookmarks